
💡 Quick Answer
Isolating a stubborn Stihl two-stroke requires a systematic check of crankcase pressure pulses, carburetor diaphragm elasticity, spark timing, and exhaust port carbon restriction. If fuel stoichiometry and compression test within spec, the failure almost always traces back to micro-cracked impulse lines or air leaks at the crankshaft seals.
Two-stroke engines operate on a tight mechanical balance where minor deviations in fuel metering, air leaks, or carbon-choked exhaust paths instantly manifest as hard starts, high-end bogging, or erratic idle speeds.
Stihl Trimmer Troubleshooting
📌 Key Takeaways
- Carburetor metering diaphragms harden from ethanol exposure, starving the combustion chamber of proper fuel delivery.
- Crankcase compression tests must be verified visually through the exhaust port to catch localized piston skirt scoring.
- Rubber impulse lines require close inspection for microscopic cracks that kill fuel pump pulsations.
- Spark arrestor screens choked with carbon backpressure the cylinder, preventing the engine from reaching operating RPM.
- Ignition module air gaps must be set precisely to ensure a clean spark fires at top dead center under load.
Diagnosing a faulty Stihl powerhead demands a methodical approach that separates ignition, fuel, and mechanical compression issues before reaching for the screwdriver. When an engine refuses to run, guessing at high-speed screw adjustments only masks underlying fuel delivery failures or crankcase air leaks. Two-stroke troubleshooting relies on understanding how the upward stroke creates a low-pressure area in the sealed crankcase to draw the air-fuel mixture through the carburetor, while the downward stroke compresses that charge before transferring it to the combustion chamber. Any compromise in this pressure loop halts the entire thermodynamic cycle.
Isolating Fuel Delivery Failures and Carburetor Diaphragm Stiffness
Modern ethanol-blended fuels aggressively attack the elastomeric components inside Zama and Walbro carburetors. When left sitting, the ethanol absorbs ambient moisture, which degrades the internal metering diaphragms and pump membranes until they stiffen like cardboard. A hardened metering diaphragm cannot flex accurately against the inlet control lever, leading to either a flooded crankcase or a lean condition that causes sudden acceleration bogging. Begin diagnostics at the tank: fish out the fuel pickup body with a hooked wire and inspect the felt or bronze filter element for varnish buildup and restriction. Next, tear down the carburetor. If the pump membrane shows curled edges or loss of pliability, replace it immediately using a fresh AmazonStihl carburetor rebuild kit . Clear the high-speed (H) and low-speed (L) fixed jets by soaking the aluminum casting in an ultrasonic bath, following up with non-abrasive brass wire gauges to punch through stubborn deposits without gouging the jet orifices.
Diagnosing Crankcase Compression and Impulse Line Integrity
Internal engine health dictates whether external carburetor tuning will ever succeed. Two-stroke scavenging relies entirely on a hermetically sealed crankcase to pump the fuel-air charge upward. Unbolt the muffler and shine a penlight into the exhaust port while slowly pulling the starter rope. Inspect the exhaust-side piston skirt for vertical scoring, feathering, or aluminum transfer from an overheating event caused by a lean run. Next, evaluate the rubber impulse line running from the crankcase floor to the carburetor mounting block. Even a microscopic dry-rot crack in this line dampens the pressure and vacuum pulses required to actuate the carburetor pump diaphragm, starving the engine of fuel under load. Perform a pressure and vacuum leak-down test by blanking off the intake and exhaust ports with machined aluminum block-off plates, then pressurizing the crankcase to eight psi using a hand pump. If the gauge bleeds down, the flywheel or clutch-side crankshaft seals have failed and must be pulled and replaced before the powerhead can maintain reliable tune parameters. For official service guidelines and technical bulletins regarding engine tolerances, consult the Stihl official resource portal to verify exact torque specifications and piston clearance limits.
Spark Ignition Diagnostics and Electronic Module Air Gaps
When a Stihl string trimmer exhibits intermittent spark or complete ignition failure, shotgun-replacing parts is an expensive mistake. You must isolate whether the fault lies in the spark plug, the kill switch circuit, or the electronic ignition module (often called the coil). Pull the plug boot and inspect the terminal spring for corrosion. A corroded or loose spring fails to make positive contact with the spark plug terminal nut, causing high resistance and erratic firing under compression.
Step-by-Step Ignition Module Air Gap Calibration
- Remove the top engine cover housing and the spark plug lead to gain unobstructed access to the flywheel and the ignition module.
- Loosen the two Torx screws securing the ignition module lamination stack just enough to allow the module to slide back and forth, but not freely.
- Rotate the flywheel until its magnetic segments align directly underneath the legs of the ignition module.
- Insert a non-conductive business card or a brass feeler gauge measuring precisely 0.010 to 0.012 inches between the flywheel magnets and the module legs.
- Allow the permanent magnets to pull the module firmly against the gauge spacer. Tighten the lower mounting screw first, then torque the upper screw to specification.
- Remove the gauge, rotate the flywheel two full revolutions, and verify that the flywheel does not physically strike the module legs during rotation.
Always validate your electrical work with an adjustable spark gap tester rather than laying the plug threads against the cylinder head. Ground the tester clip to a solid metal engine bolt and crank the starter rope. A healthy Stihl electronic ignition system must produce a crisp, snapping blue spark that easily jumps a 0.016-inch air gap. If the spark is yellow, weak, or non-existent, unplug the low-tension stop wire running from the ignition module to the switch. If spark returns with the stop wire disconnected, your wiring harness or primary stop switch is shorting to ground.
Exhaust Port Carbon Choke and Spark Arrestor Screen Decarbonization
Two-stroke engines rely on uninhibited exhaust gas scavenging to draw the fresh fuel-air charge into the combustion chamber. When using incorrect oil mix ratios or low-grade oils, unburnt hydrocarbons bake onto the hot interior walls of the exhaust port. This carbon buildup acts as a physical dam, severely choking exhaust velocity and restricting high-end RPM. If your trimmer starts easily when cold but loses all power and stalls the moment the engine reaches operating temperature, suspect a blocked spark arrestor screen.
The spark arrestor is a small wire mesh screen nestled directly inside the muffler outlet port. Over time, soot completely blinds the open wire squares, trapping exhaust gas pressure inside the cylinder. Remove the spark arrestor retaining screw and pull the screen out using needle-nose pliers. Hold the screen with pliers and apply direct flame from a propane torch until the carbon turns to glowing ash. Brush away the remaining residue with a brass wire brush before reinstalling.
Cylinder Exhaust Port Scraping Protocol
- Remove the muffler assembly entirely from the cylinder face to expose the exhaust port opening.
- Rotate the crankshaft slowly via the starter rope until the piston rises to top dead center. This completely covers and protects the piston rings from falling carbon debris.
- Using a dedicated wooden scraper or a blunt brass pick, gently flake away the heavy carbon crust accumulated along the roof and sides of the aluminum exhaust port. Never use hardened steel screwdrivers or razor blades, as gouging the soft aluminum cylinder wall will immediately destroy compression.
- Flush the port thoroughly with aerosol Amazoncarburetor cleaner while holding the trimmer at a downward angle so dissolved carbon flushes outward, away from the open cylinder.
- Crank the engine a few times with the muffler off to blow out residual solvent before reinstalling the exhaust gasket and muffler bolts with high-temp threadlocker.
Recommended Tools That You Need
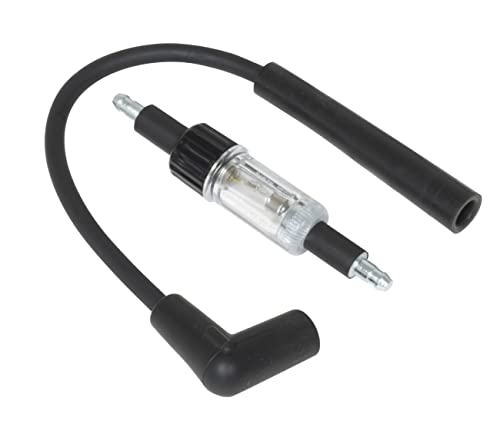
Lisle 20610 Inline Spark Tester

Ram-Pro Inline Spark Tester, Plug Engine
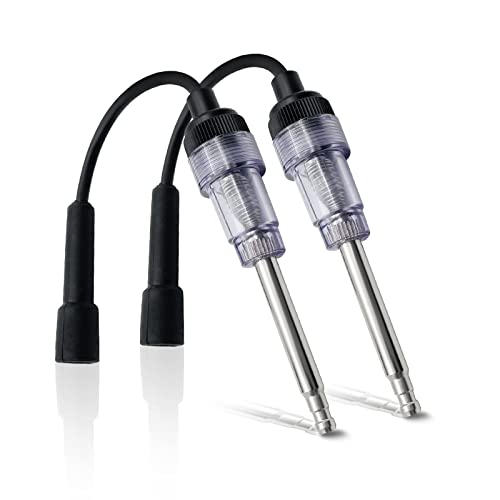
2PCS Spark Plug Tester, Engine Ignition

YEYETUO 2PCS Spark Plug Tester, Ignition

SINGARO 2PCS Inline Spark Plug Tester
Frequently Asked Questions
Why does my Stihl trimmer run for 5 minutes and then die when hot?
This thermal-induced failure is almost always symptomatic of a failing ignition coil breaking down internally as resistance increases with operating temperature, or a vapor-locked fuel tank caused by a blocked tank vent. When the engine dies, immediately check for spark using an inline tester. If the spark disappears completely when the engine is hot, replace the ignition module. If spark remains strong, inspect the tank vent duckbill valve to ensure it is allowing air to enter the tank as fuel is consumed.
How do you adjust the high and low carburetor screws on a Stihl trimmer?
Modern Stihl carburetors often feature limiter caps that restrict full rotational movement, which may require specialized spline or D-shaped adjustment tools. Start by gently turning both the high (H) and low (L) mixture screws clockwise until lightly seated, then back them out counter-clockwise to the factory baseline setting, usually one full turn. Fine-tune the low screw until the engine idles smoothly without engaging the clutch, and adjust the high screw under load to prevent a lean bog when squeezing the throttle.
Why is gas leaking from the air filter housing on my Stihl trimmer?
Fuel pooling in the air cleaner housing indicates that the carburetor inlet needle valve is failing to seat properly against its rubber tip seat, allowing fuel from the pressurized tank to gravity-feed past the metering chamber and flood the intake tract. This is frequently caused by microscopic debris trapped under the needle or a hardened, stiffened metering diaphragm. Clean the internal passages thoroughly and rebuild the carburetor using an authorized overhaul kit.
How can you tell if a Stihl trimmer has a scored piston or blown cylinder?
Remove the muffler and use a penlight to look directly at the exhaust side of the piston skirt. If you see vertical metallic scoring lines, discoloration, or aluminum transfer smeared across the piston rings, the engine has suffered catastrophic failure from straight-gassing, lean running, or overheating. Compression testing will reveal reading drops significantly below the standard ninety to one hundred psi threshold required for reliable combustion.
What causes a Stihl trimmer to bog down and die when I pull the throttle?
A hesitation or bog during acceleration points directly to a lean fuel condition, an obstructed main fuel pickup filter inside the tank, or a partially clogged spark arrestor screen. When you open the throttle butterfly, the engine demands an immediate surge of fuel. If the acceleration pump circuit or main jet is restricted by varnish, the air-fuel ratio turns dangerously lean, causing the engine to stumble and die under load.
Conclusion
Mastering Stihl two-stroke diagnostics requires a disciplined approach to physical and chemical isolation. By systematically verifying spark timing air gaps, maintaining clean exhaust pathways, and protecting precision aluminum tolerances from carbon scoring, you eliminate guesswork. Keep your fuel fresh, maintain your spark arrestor screens, and let empirical diagnostic testing dictate your repair path rather than guesswork.