
💡 Quick Answer
To finish a doorway without a door, stabilize the structural framing with plumb studs and a solid header, then wrap the interior opening using precision-cut drywall returns and heavy-duty corner beads. This creates a clean, architectural pass-through that eliminates mechanical hardware while maintaining structural integrity.
Transitioning an enclosed room into an open-concept pass-through requires a systematic approach to structural alignment and edge detailing. Without a door slab, jamb, or casing to hide imperfections, every millimeter of framing and drywall work remains permanently exposed to the eye.
How to Finish a Doorway Without a Door
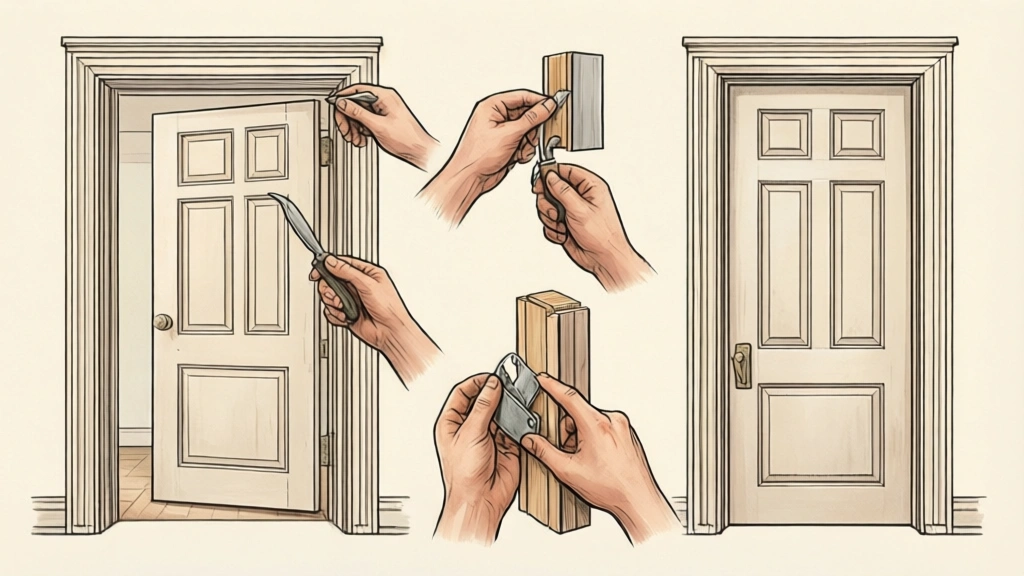
Before driving a single screw, you must evaluate the load-bearing status of the wall. Non-load-bearing partition walls simply require squaring up the rough opening, whereas load-bearing walls demand an intact, properly sized header that transfers weight down through the king and jack studs. Check every vertical framing member with a 4-foot or 6-foot level. If your studs twist, bow, or lean out of plumb, your finished pass-through will magnify these geometric errors.
Measure the diagonal corners of the rough opening to verify squareness. Even a fraction of an inch out of square will cause visible tapering once drywall returns or jamb liners are installed. Make any necessary shimming adjustments to the framing before closing up the cavity. According to standard JLC structural framing guidelines, securing a rigid framework prevents the joint compound from cracking under normal home settling and seasonal humidity shifts.
📌 Key Takeaways
- Verify whether the partition wall is load-bearing before altering headers or studs.
- Check plumb, level, and square across all inner surfaces of the rough opening.
- Understand the exact layer-by-layer interaction between king studs, drywall, and corner beads.
- Calculate exact drywall strip widths to match the combined depth of the framing and drywall layers.
- Use rigid vinyl or metal corner beads to protect high-impact outer edges from chipping.
Anatomy of an Open Pass-Through
A jambless pass-through relies on a sandwich of structural and finishing layers working in unison. At the core sit the king studs and jack studs, which provide the raw load-bearing capacity. Over these go the face layers of drywall, typically 1/2-inch or 5/8-inch thick depending on local fire codes and wall specifications.
The critical junction occurs at the corner where the face wall meets the interior return. Here, a specialized corner bead—such as a rigid vinyl square-corner profile or a paper-faced metal bead—anchors directly to the drywall edge. This bead acts as a physical screed for your joint compound and guards the sharp 90-degree corner against impact damage from foot traffic, furniture, and daily wear. At the floor level, ensure your baseboards terminate cleanly into a back-band or a custom transition block rather than abruptly stopping against open air.
Drywall Return Method: Step-by-Step Framing and Mudding
Executing a flush drywall return requires meticulous measuring and cutting. Measure the exact thickness of the wall assembly from face drywall to face drywall. Rip narrow strips of drywall to match this exact dimension using a Amazondrywall T-square and a utility knife to ensure straight, clean edges.
Screw these interior drywall return strips directly to the framing studs, keeping the edges flush with the outer wall surface. Install your corner beads along both the interior and exterior intersecting angles, pressing them firmly into a bed of all-purpose joint compound or securing them with Amazonfine thread drywall screws and spray adhesive depending on the manufacturer specifications.
Apply the first coat of joint compound over the corner bead flanges and let it dry completely. Feather each subsequent coat wider than the last, building a smooth, gradual slope that disappears into the surrounding wall plane. Sand lightly between coats with a fine-grit sanding sponge, prime the raw gypsum and mud, and finish with two coats of high-durability interior paint to achieve a seamless, high-end architectural transition.
Trimmed Architectural Openings: Casing and Jamb Liners
Framing a pass-through with drywall returns delivers a seamless, minimalist modern aesthetic, but it is not the only path. For traditional, transitional, or craftsman-style homes, wrapping the rough opening with engineered jamb liners and flat stock casing creates structural depth and visual weight that holds up exceptionally well against constant foot traffic. Skipping the door slab does not mean you have to skip the traditional millwork architecture.
Material selection dictates the longevity of your high-traffic threshold. Finger-jointed pine offers superior impact resistance compared to standard softwoods, making it an ideal candidate for jamb extensions that inevitably take hits from furniture, vacuums, and moving boxes. Medium-density fiberboard (MDF) provides an impeccably smooth, knot-free surface profile for painted applications, though it absorbs moisture rapidly and requires thorough priming on all raw edges prior to installation.
Step 1: Sizing and Milling the Jamb Liners
Measure the exact thickness of the wall assembly—including studs, drywall layers, and surface finishes—at multiple points along the top and sides of the rough opening. Rip your jamb stock on a table saw to match this exact dimension. If your framing is out of plumb or out of square, rip the jamb stock with a slight taper to match the wall's imperfections, ensuring the interior edge sits flush with the drywall surface on both sides.
Step 2: Installing and Scribing the Jamb Assembly
Secure the head jamb first using 15-gauge finish nails driven through the face into the rough framing header, countersinking the heads below the wood surface. Plumb and install the two side jambs, shingling behind the wood with cedar shims wherever gaps exist against the structural studs. Verify diagonal measurements to guarantee the opening remains square before locking the side jambs in place with a masonry-grade pneumatic nailer.
Step 3: Miter Joint Alignment and Casing Nailing Schedules
Cut your flat stock casing with 45-degree compound miters, leaving a standard 3/16-inch reveal back from the interior edge of the jamb liners. Apply a high-tack exterior wood glue to the miter joints to lock the corners permanently and prevent seasonal gap separation. Fasten the casing to the wall framing using 2-inch brad nails every 12 inches, and use pneumatic pin nails cross-pinned directly through the mitered corners to hold the joint tight while the adhesive cures.
Acoustic and Visual Continuity in Open Floor Plans
Removing a physical door drastically alters how sound waves and sightlines travel between adjacent rooms. Without a solid-core barrier to trap noise, an open archway acts as a literal megaphone for household audio. Restoring acoustic discipline requires planning beneath the surface of the wall before any drywall or casing goes up.
Pack the interior partition cavities with mineral wool batt insulation during the framing stage. Unlike lightweight fiberglass, dense mineral wool absorbs airborne frequencies and dampens sound transmission across rooms. Pair this acoustic core with intelligent surface treatments. High-traffic open corners demand rigorous durability, which means ditching flat paints in favor of a scrubbable satin or eggshell finish that resists scuffing while minimizing harsh light glare.
Flooring transitions require equal attention when a door is eliminated. Without a traditional door stop to hide the threshold break, your flooring materials must meet cleanly beneath the center of the opening. Utilize a matching T-molding or a flush-mounted metal transition strip anchored directly to the subfloor to prevent fraying carpet edges, chipping luxury vinyl plank, or buckling hardwood expansion gaps.
Recommended Tools That You Need

Columbia Outside 90 Laminate Bead Roller
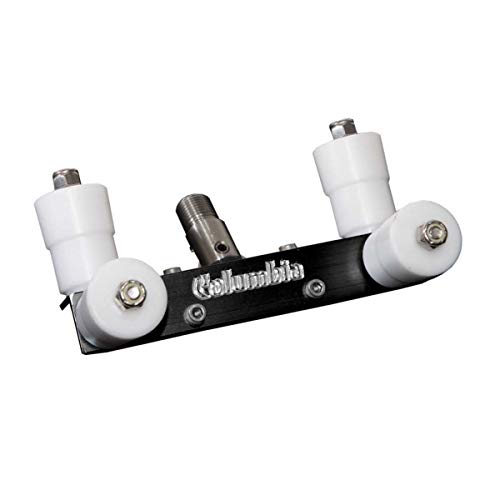
Columbia Taping Tools Drywall Outside Corner

Strait Flex Drywall Tape – Perfect-90°

UNRUNFO-Reinforced-Drywall-Corner-Tape-for-Walls - Drywall Inside Outside Corner

Columbia Outside 90 Laminate Bead Roller
Recommended Physical Tools
- 15-Gauge Pneumatic Finish Nailer
- Precision Table Saw with Fine-Tooth Carbide Blade
- Compound Miter Saw
- Non-Shrinking Wood Glue
- Laser Level and Framing Square
Frequently Asked Questions
How do you finish the inside of a door frame without a door?
You can finish the interior either by installing drywall returns—where drywall wraps around the studs and finishes with metal corner beads—or by building a custom wood jamb liner and casing kit. Drywall returns offer a clean, modern, minimalist look, while wood jambs and casing provide a traditional architectural aesthetic that protects high-impact corners from damage.
Should I use drywall returns or wooden casing for an open archway?
The choice depends entirely on your home's interior design language and anticipated wear-and-tear. Drywall returns blend walls seamlessly into the opening for contemporary spaces, but they chip easily if struck by furniture. Wooden casing and jamb liners add visual weight, define the threshold clearly, and take physical impacts much better in high-traffic corridors.
How do you prevent drywall corners from cracking in high-traffic open doorways?
Traditional paper tape over standard metal corner bead frequently cracks under the structural vibration of high-traffic openings. To prevent this, install heavy-duty structural corner beads like composite vinyl-backed beads or rigid metal-backed tape-on products embedded in setting-type joint compound (durabond) rather than standard premixed bucket mud.
Can you remove an interior door frame and make it a clean open arch without tearing out the wall?
Yes. You can carefully pry away the existing casing, remove the door stop and jambs, and cut back the protruding shims. From there, you patch the exposed wall edges with new strips of drywall, tape the transition joints, apply corner beads, and feather out the joint compound to meet the existing wall plane.
What is the best way to transition baseboards when removing a doorway?
When an old door frame is removed, the baseboards will terminate abruptly where the casing used to sit. The cleanest way to handle this is to cut the existing baseboard square, install a finished return piece (often called a base corner return or end cap), or run the baseboard directly into a newly installed plinth block at the base of your new archway jamb.
Conclusion
Transitioning a closed room into an open-concept pass-through elevates the spatial flow and natural light distribution of a home. Whether you choose the sharp, unadorned lines of a drywall return or the structural durability of custom wood jamb liners, meticulous preparation and precise alignment guarantee a professional result. By managing acoustic insulation, corner reinforcement, and material transitions, you create a timeless architectural feature that enhances everyday living without relying on mechanical hardware.